

Congratulations on getting your new Lockly Smart Lock! We're here to guide you through the installation process. Start by watching the installation video specifically designed for your lock. After that, feel free to read through the general step-by-step instructions below. Following them carefully will ensure you don't miss a thing. Happy installing!
1) Prep the door.

Please review Step 1 of the Installation Manual and measure the door to make sure everything is correct.
The ½ inch hole on the top is for stabilizing the lock. We have supplied 3M double sided tape to help secure your new lock in place. You do not need to drill a hole to secure the door, however, you can do so if you wish for extra security. You can remove the pole by removing the pole counterclockwise with a flat head screwdriver.

2) Adjusting the Bolt

The bolt can be adjusted depending on where the hole was drilled for your lock. Make sure when you install the bolt all the way, the + sign in the middle of the hole. The bolt can be extended between 2 ¾ and 2 3/8” in order to fit your door.

3) Extending the Bolt

Use a Philips screwdriver to turn clockwise and extend the bolt fully out as if a door was locked. Make sure the THIS SIDE UP sticker is above the position of the + mark. Use the supplied screws to secure the bolt in place into the door.
4) Preparing the Exterior Assembly

Assemble the pieces as shown in your instruction manual with the rubber piece securely attached to the back of the exterior piece of the lock.
5) Installing the Exterior Assembly

Install the exterior assembly py passing the cable underneath the deadbolt and the torque blade through the + sign of the deadbolt. When passing the torque blade through, make sure that the torque blade is passed through in the vertical position. While this is all happening, it's critical to make sure your deadbolt is still fully extended.

Pass the cable through the hole of the metal plate supplied to mount the interior and secure the cable by passing it through the bottom and to the side.
Use the supplied screws to secure the lock on the bottom.
 Secure the top if you have drilled a hole in your door with supplied screws, otherwise, you can attach the back plate with 3M tape (recommended).
Make sure the lock is secured tightly by trying to move the lock with your hands, Use the supplied keys to turn the deadbolt to ensure the deadbolt is moving in a smooth operation.

6) Installing The Interior Assembly
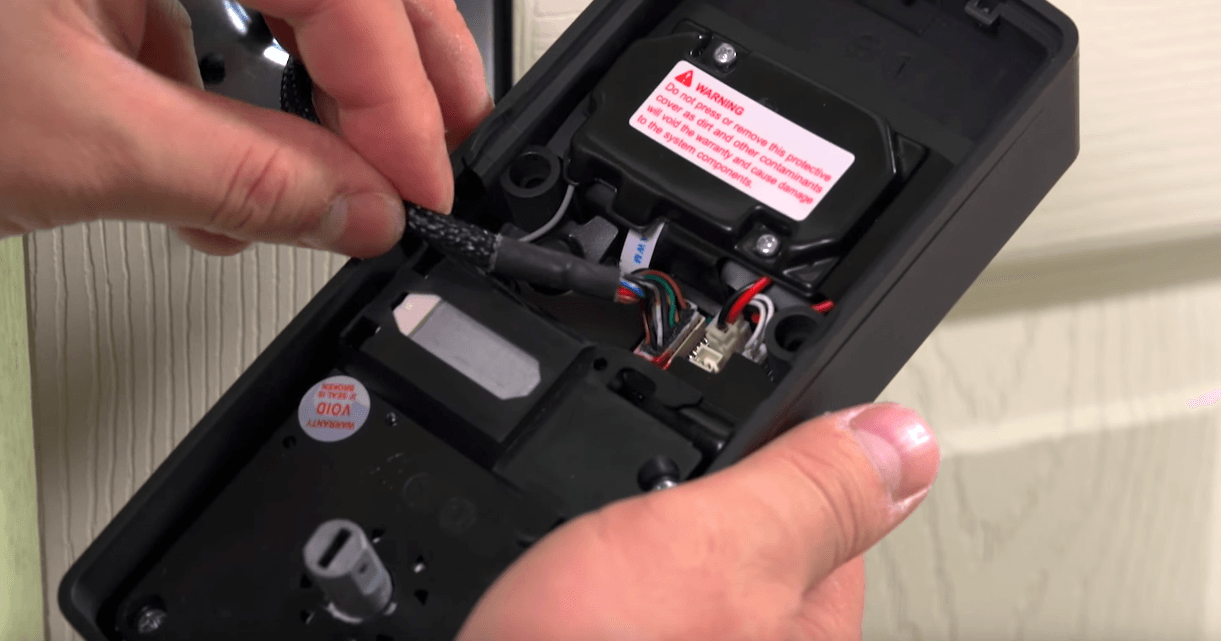
 Install the cable by matching the Red side to the Red side marked on the interior lock and plug in securely.
Make sure the thumb turn is vertical and you install the interior lock piece by sliding the torque blade into the lock vertically. If your torque blade is horizontal (left to right), remove the exterior piece of your lock and re-install vertically.

7) Securing the Interior Lock
Secure the lock by installing the 2 screws located right below the batteries with the supplied screws.

Before installing batteries, make sure your thumb turn is still facing vertically up, and your deadbolt is fully extended (locked position).

8) Installing Batteries
Install three batteries first.

Before putting in the 4th battery, press and hold the PROGRAM button while you install the 4th battery.

You will hear a series of rapid beeps and you can let go of the PROGRAM button and the lock automatically programs itself for a right swing door or left swing door.

Install the battery cover and secure it with Phillips screwdriver on the top.

Test the lock by turning the thumb turn again and verify the deadbolt to move smoothly.
9) Installing Door Strike

Install the door strike by screwing the screws to complete the installation. Close your door and make sure that the deadbolt will lock and unlock smoothly.
Congratulations, you're done! Now Install the Lockly Home App to set it up!


